


Product overviews
This kit is used for quantitative detection of mouse CK-MB1 concentration in serum, plasma, or cell culture supernatant samples for research purposes only, not for clinical diagnosis.
Background:
CK-MB isoenzyme exists in two isoforms: CK-MB1 and CK-MB2. The laboratory determination of CK-MB represents a simple sum of the isoenzymes CK-MB1 and CK-MB2. CK-MB2 is the tissue form initially released from the myocardium after myocardial infarction (MI). After symptoms occur, it rapidly converts to the CK-MB1 subtype in serum. Under normal circumstances, the tissue CK-MB1 isoenzyme predominates. Therefore, the ratio of CK-MB2 to CK-MB1 is usually less than 1. CK-MB2 can be detected in serum within 2-4 hours after onset and peaks at 6-9 sati, making it an early marker of acute myocardial infarction. Two large studies evaluating its use showed a sensitivity of 92% na 6 hours after onset, compared to 66% for CK-MB and 79% for myoglobin.
Detection Principle:
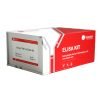
The Solarbio (Solarbio®) ELISA kit uses enzyme-linked immunosorbent assay technology based on sandwich double-antibody method. Monoclonal antibody against mouse CK-MB1 is coated on the enzyme plate. Standard samples and pre-diluted samples are added separately. Mouse CK-MB1 in standard samples and samples will fully bind to the coated antibody on the plate. After washing, a biotinylated anti-mouse CK-MB1 antibody is added, which will specifically bind to mouse CK-MB1 captured by the coated antibody on the plate. After washing, horseradish peroxidase (HRP)-labeled streptavidin is added, and biotin will undergo a high-intensity non-covalent binding with streptavidin. After washing, TMB substrate is added for color development. If mouse CK-MB1 at different concentrations exists in the reaction wells, HRP will turn colorless TMB into a blue substance with different shades (positively correlated). After adding the stop solution, the reaction wells will turn yellow. Finally, the absorbance (OD) of the reaction well samples is measured at λmax=450 nm (OD=450nm). The concentration of mouse CK-MB1 in the sample is directly proportional to OD. The concentration of mouse CK-MB1 in the sample can be calculated by plotting the standard curve and using four-parameter fitting software.
Mjere predostrožnosti:
- The stop solution in the kit is an acidic solution. Operators should wear gloves and take protective measures when using it. Avoid contact with all reagents on the skin and eyes during the operation. In case of accidental contact, rinse with plenty of water. When testing blood samples and other body fluid samples, please follow the relevant management regulations of national biological laboratories for safety protection.
- When the kit is not in use, store it in a refrigerator at 2-8°C within the shelf life. Discard any remaining reconstituted but unused standard solutions or aliquot them according to the needs, and store them in a refrigerator at -20 to -80°C.
- Allow the kit to equilibrate to room temperature for 30 minutes before use, and thoroughly mix all components in the kit and prepared samples.
- The kit cannot be used up at once. After returning to room temperature, remove the enzyme plate strips needed, cover the remaining ones with sealing tape, and place them back into the sealed bag.
- It is recommended to perform duplicate hole tests for standard samples and samples during the experiment, and the order of adding reagents should be consistent. To ensure accurate results, a standard curve must be performed for each test.
- To avoid cross-contamination, use disposable EP tubes, pipette tips, sealing tapes (※), and clean plastic containers in the experiment.
- The volumes of concentrated enzyme-labeled antibodies, concentrated biotinylated antibodies, and concentrated enzyme conjugates are small. During transportation, trace amounts of liquid may adhere to the tube walls and bottle caps. Before use, centrifuge (5-10 sekundi) to collect the liquid on the bottom of the tube, and carefully pipette when taking it out.
- Do not use reagents from other batch numbers or other sources to replace the reagents in this kit.
Technical Points:
- When reconstituting or mixing standard solutions, gently mix to avoid bubble formation.
- Thorough mixing is particularly important for reaction results. It is best to use a microplate mixer (mix at a low frequency).
- When using an automatic plate washer, set a soaking program for 10-30 seconds after adding the wash solution, or reverse the microplate 180 degrees in different washing steps to improve washing efficiency.
- To ensure the accuracy of results, seal the enzyme plate strips with sealing tape during incubation.
- The substrate should be colorless before addition, and keep it protected from light at all times.
- The order of adding the stop solution should be the same as adding the substrate.
- After adding the stop solution, the color of the substrate should change from blue to yellow. If the substrate appears green, it indicates insufficient mixing of the stop solution and substrate.
- Pre-experiment testing of samples is required. Proper sample dilution should be performed according to the experimental design to ensure that the sample values fall within the range of the kit standard curve.
- Avoid contact with the inner and outer surfaces of the microplate under any circumstances.
Laboratory Equipment:
- Microplate reader (main wavelength 450 nm, reference wavelength 630 nm)
- High-precision pipettor and disposable tips: 0.5-10, 2-20, 20-200, 200-1000 μL
- Plate washer or wash bottle
- Double distilled water or deionized water
- EP tubes, graduated cylinders, absorbent paper
- 37°C incubator
Sample Collection and Storage:
- Serum Samples: Allow room temperature blood to clot naturally for 30 minuta, then centrifuge at 1000×g for 15 minutes at 4°C. Transfer the supernatant into small EP tubes in equal volumes and store below -20°C (samples can be stored at 2-8°C for up to 24 hours before testing; if precipitation occurs during storage, centrifuge again to avoid repeated freeze-thaw cycles).
- Plasma Samples: Collect whole blood into tubes containing anticoagulants, such as EDTA, sodium citrate, or heparin, according to the specific requirements of the specimen. Mix for 20 minuta, then centrifuge at 1000×g for 15 minutes at 4°C. Transfer the supernatant into small EP tubes in equal volumes and store below -20°C (samples can be stored at 2-8°C for up to 24 hours before testing to avoid repeated freeze-thaw cycles).
- Cell Culture Supernatant: Transfer cell culture medium to sterile centrifuge tubes and centrifuge at 1000 ×g for 10 minutes at 4°C. Transfer the supernatant into small EP tubes in equal volumes and store below -20°C (samples can be stored at 2-8°C for up to 24 hours before testing to avoid repeated freeze-thaw cycles).
- Tissue Homogenate: Rinse the tissue with pre-cooled PBS (0.01M, pH=7.4) to remove residual blood, then weigh and chop the tissue. Place the chopped tissue into a glass homogenizer with a corresponding volume of PBS (generally in a weight-volume ratio of 1:9, such as 1 g of tissue sample corresponding to 9 mL of PBS; adjust the volume according to experimental needs and record it).
It is recommended to add a protease inhibitor to PBS. Grind the tissue thoroughly on ice. For further tissue cell lysis, the homogenate can be subjected to repeated freeze-thaw cycles or ultrasonic disruption. Finally, centrifuge the homogenate at 2-8°C, 5000×g for 5-10 minuta, and collect the supernatant for testing.
※ Special Notes:
- This kit may be suitable for other biological samples, but experimental validation is required.
- Visible precipitates in the samples must be removed before testing.
- Avoid using hemolytic or hyperlipidemic samples for serum and plasma samples to avoid affecting the test results.
- If the detected concentration of the target analyte in the sample exceeds the highest value of the standard, the sample should be appropriately diluted before testing. A pre-experiment must be conducted to determine the dilution factor before the formal experiment.
Reagent Preparation:
- Reagent Equilibration: Place the kit and samples to be tested at room temperature 30 minutes before the experiment. If the concentrated wash solution crystallizes, place it in a 37°C water bath until all crystals dissolve.
- Preparation of Wash Solution: Calculate the volume of diluted wash solution needed in advance. Dilute the 20× concentrated wash solution with double distilled water or deionized water to obtain a 1× working solution. Store any unused concentrated wash solution in a refrigerator at 4°C.
- Gradient Dilution of Standard Solutions: Before opening, ensure that all lyophilized standard substances are at the bottom of the container. Dodati 0.733 mL of SR1 Standard/Sample Diluent (2A) to the lyophilized standard substance (concentration: 80000 pg/mL). Let it stand for 10-30 minutes until completely dissolved, then gently mix after dissolution. Perform a 2-fold dilution according to the following concentrations: 80000, 40000, 20000, 10000, 5000, 2500, i 1250 pg/mL. The concentration of 80000 pg/mL is the highest point on the standard curve, and SR1 Standard/Sample Diluent (2A) serves as the 0 well (0 pg/mL) of the standard curve. Any unused reconstituted standard stock solution (80000 pg/mL) should be discarded or aliquoted according to needs and stored in a refrigerator at -20 to -80°C.
Detection Steps:
Before testing, equilibrate all reagents and samples to room temperature.
- Prepare all necessary reagents and standard solutions at working concentrations.
- Set up standard wells, zero wells, and sample wells. Calculate the number of strips required for the current experiment, remove the unnecessary strips, reseal them with new sealing films, and place them back into the aluminum foil bag containing desiccants.
- Soak the enzyme plate: Dodati 300 μL of 1× wash solution and let it soak for 30 sekundi. Discard the wash solution and pat dry the microplate on absorbent paper. Repeat this step twice. Note: After washing, use the microplate immediately and do not let it dry out.
- Add standard solutions: Dodati 100 μL of 2-fold diluted standard solutions to the standard wells. Dodati 100 μL of standard/sample diluent to the zero wells.
- Add samples: Dodati 100 μL of the test samples to the sample wells. Ensure continuous addition of samples in steps 4 i 5 without interruption. Complete the sample addition process within 10 minuta.
- Incubation: Seal the plate with a new sealing film. Incubate at room temperature (25±2°C) with shaking for 120 minuta.
- Wash: Discard the liquid, add 300 μL of wash solution to each well, and wash four times. Pat dry the microplate on absorbent paper after each wash. To obtain ideal experimental results, it is essential to thoroughly remove residual liquid. Note: After washing, proceed immediately to the next step and do not let the microplate dry out.
- Add biotinylated detection antibody: Dodati 100 μL of biotinylated antibody working solution to each well.
- Incubation: Seal the plate with a new sealing film. Incubate at room temperature (25±2°C) with shaking for 60 minuta.
- Wash: Discard the liquid, add 300 μL of wash solution to each well, and wash four times. Pat dry the microplate on absorbent paper after each wash. Note: To obtain ideal experimental results, it is essential to thoroughly remove residual liquid. After washing, proceed immediately to the next step and do not let the microplate dry out.
- Add enzyme conjugate: Dodati 100 μL of enzyme conjugate working solution to each well.
- Incubation: Seal the plate with a new sealing film. Incubate at room temperature (25±2°C) with shaking for 30 minuta.
- Wash: Discard the liquid, add 300 μL of wash solution to each well, and wash five times. Pat dry the microplate on absorbent paper after each wash. Note: To obtain ideal experimental results, it is essential to thoroughly remove residual liquid. After washing, proceed immediately to the next step and do not let the microplate dry out.
- Add substrate for color development: Dodati 100 μL of TMB substrate to each well, avoid light exposure, and incubate at room temperature (25±2°C) for color development for 5-30 minuta. Note: The color development time can be adjusted based on the actual color development situation, but should not exceed 30 minuta. Terminate the reaction when there is a noticeable gradient of color in the standard wells (a clear blue gradient in the first 4 wells of the standard wells, with the next 3-4 wells showing no clear gradient). Preheat the microplate reader 15 minutes in advance.
- Add stop solution: Dodati 50 μL of stop solution to each well. Try to add the stop solution in the same order as the substrate addition. Note: The color of the liquid in the microplate wells will change from blue to yellow after adding the stop solution. If the color appears green or the color change is uneven, gently tap the frame of the plate to mix it horizontally.
- Reading the measurements: Within 5 minuta, perform dual-wavelength detection using a microplate reader to measure the OD values at the maximum absorbance wavelength of 450 nm and the reference wavelength of 630 nm. Note: The calibrated OD value is the measurement value at 450 nm minus the measurement value at 630 nm. (Note: The OD value at 630 nm is the absorbance value of the microplate material. If dual-wavelength detection cannot be performed, only measure the OD value at 450 nm wavelength, but the accuracy of the data will be slightly reduced.)


Recenzije
Još nema recenzija.